How can you make sure your ads are more effective and budget-friendly? When you search for something on Google or any other search engines, first results that appear are generally in the sponsored ads section. When using ads, Google Keyword Planner is one of the most effective tools that enable you to gain insights into discovering new keyword opportunities and analyzing existing keywords.
In this article, I’ll show you how to use Google Keyword Planner for PPC campaigns. It’ll give you a clear idea of how much money you’re spending and how effective your ads really are. You need to have a solid understanding of how keywords work and what kind of traffic you can expect from them.
What is a keyword?

A keyword is a word or phrase that a searcher enters into the search bar to find information on a particular topic. The goal of a keyword is to be relevant to the searcher’s intent. That is, it should match the user’s search intent and contain words that will make the searcher click on your website.
In PPC marketing, advertisers use keywords to show their ads to potential customers. If the user’s search queries match the keywords you have chosen for your ad campaign, there’s a good chance your ad will be shown to them.
By choosing appropriate keywords that align with your target audience’s search intent, you can easily reach people who are interested in your products and services. You can convert these users into customers more easily than random users. In other words, you don’t waste time and money on people who aren’t ready to buy.
How do you find the right keywords? Certainly with effective keyword research. There are several ways to find keywords. Today I’m going to detail one of those methods, the Google Ads Keyword Planner.
What is the Google Keyword Planner?
The Google Keyword Planner offers numerous suggestions for keywords and helps you create powerful ad strategies. Plus, it’s free to use!
It’s impossible to predict all the search queries your potential customers will use to find your business. However, with Google Keyword Planner, you can easily access all this data.
How to use the Google Ads Keyword Planner
Now I’ll explain the Google Ads Keyword Planner step by step. To improve your advertising strategies, you need to know how to read the results page.
Step 1: Sign up for the Google Keyword Planner

First things first, you need a Google Ads account if you want to use Keyword Planner. You can sign up for a new account in just a few minutes. You don’t need to have an active campaign to use the Keyword Planner. After accessing your account, click on the “TOOLS & SETTINGS” section and select “Keyword Planner”.
Step 2: Choose a tool
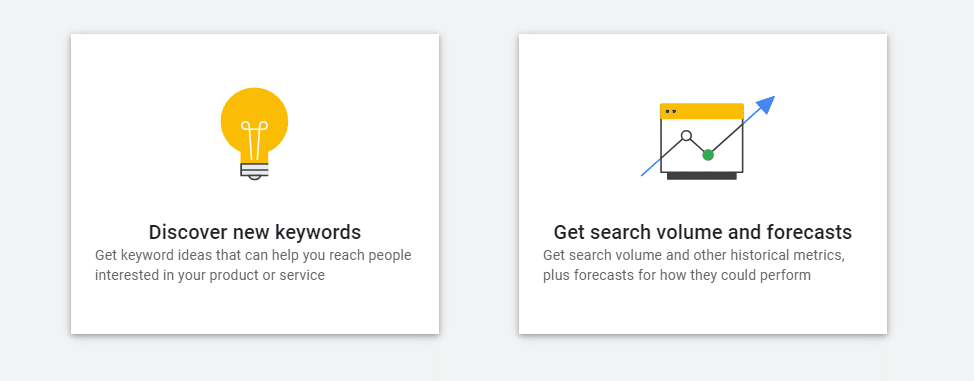
Then choose a tool between “Discover new keywords” and “Get search volume and predictions”. But first, ask yourself: what is your goal with these tools? If you want to do keyword research for your PPC campaigns, these tools are just fine. However, if you want to do SEO-focused keyword research, you don’t need to use features like Keyword Bidding.
Tool 1: Discover new keywords
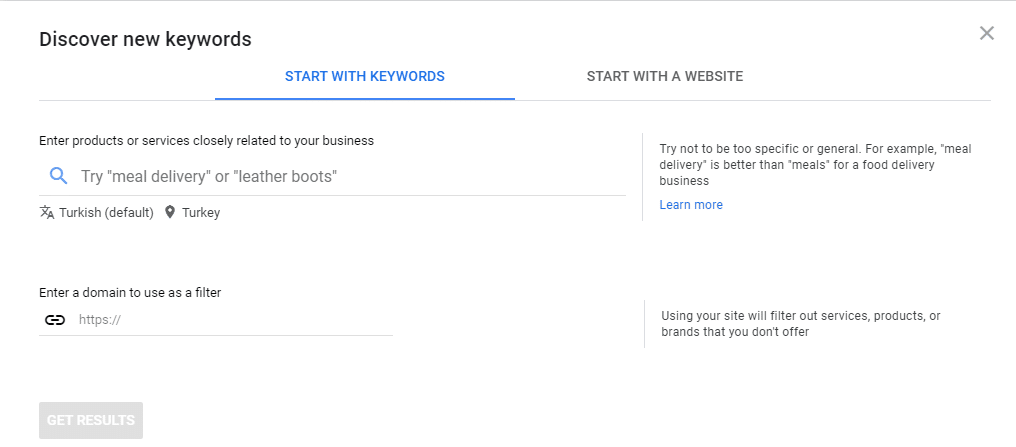
It suggests several new keywords that you can use to reach your target audience. There are two options. You can enter “products or services closely related to your business” by selecting “Start with keywords”. Besides, you can enter multiple keywords in the search bar. Simply place a comma after each keyword and press the space bar or Enter key.
“Start with a website” is more suitable for Google Ads users. However, why not give it a try if you are doing an SEO-focused keyword research?
After entering your data in one of the sections, click on “Get Results”.
Tool 2: Get search volume and forecasts
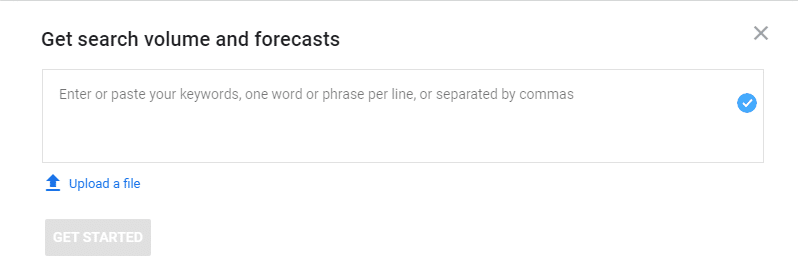
It helps you to check the search volume of your keyword list and not generate new keywords, so copy your list to paste the empty area and click on “Get Started”.
You’ll see Google’s prediction for clicks and impressions of keywords you entered on the keywords results page.
Step 3: Filter to perform a deeper analysis

After you get your results, you can filter the results that you think would make your analysis more effective.
At the top of the page, you will see four options.
- Locations: This option allows you to filter the countries where you market.
- Language: Here you can filter the languages of the keywords you want to see information about.
You can select the location and language according to the target audience, where they live and what language they speak.
- Search networks: If you also want to have paid ads on search partner sites and Google properties like YouTube, you can change the option as “Google and search partners”. If you only want to advertise on Google, choose “Google”.
- Date range: You can set a specific date or leave it at the default 12 months.
On the results page, you’ll also find various filters under “Add filter”.

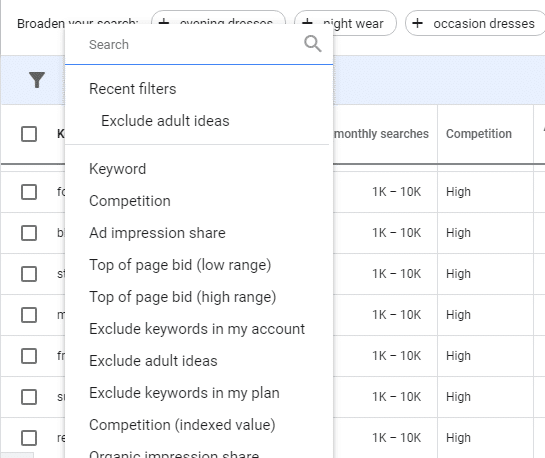
Keyword: If you add this filter, only keywords containing a specific phrase will be displayed.
Exclude Keywords in My Account: After you add this filter, it excludes keywords that you’re already bidding on Google Ads.
Exclude adult ideas: It removes keywords that contain adult content.
Ad Impression Share: For Google Ads only.
Organic Impression Share: It helps you see how often your website appears in organic search for each keyword. If you want to use this filter, don’t forget to connect your Google Search Console account with Google Ads.
Organic Average Position: It shows where you rank on the Google results page for each search term. You need to connect your Google Search Console account to Google Ads to use this feature.
Broaden your search: This feature helps you expand your search by making suggestions for the keyword you’re analyzing.

Step 4: Sort and analyze your results
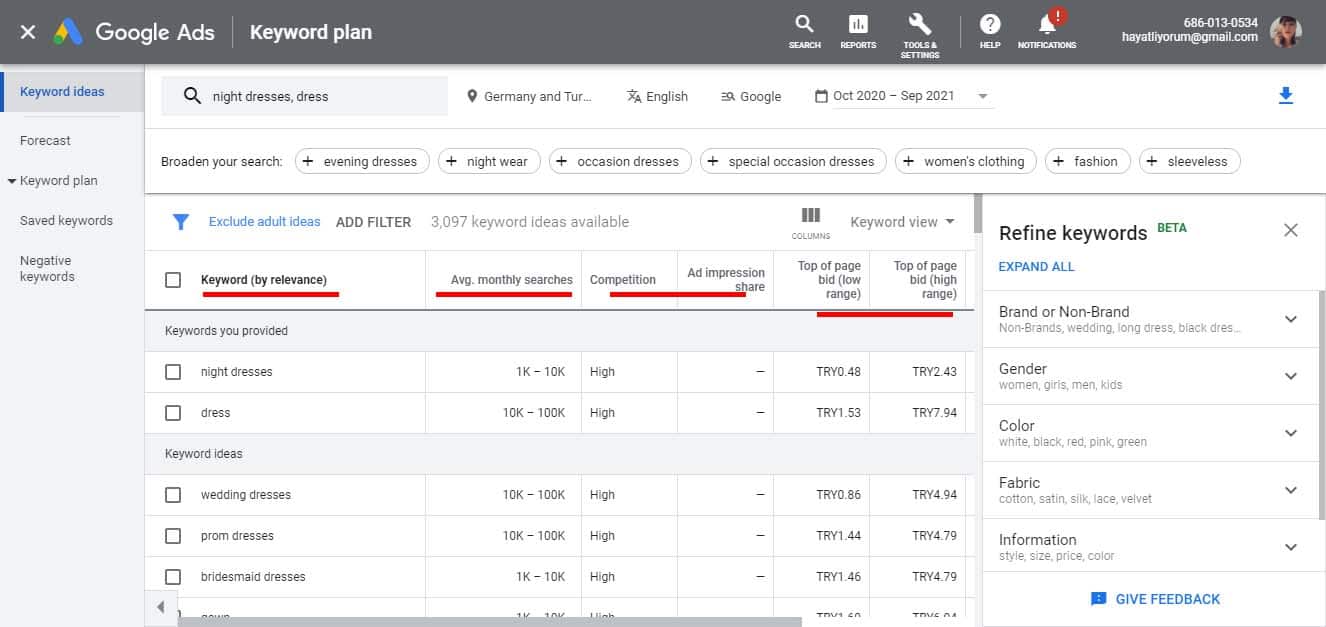
You can sort your results by playing with the following options: After you have filtered and sorted, the next step is to analyze the remaining terms.
- Keyword (by relevance): This is a list of the most relevant keywords or URLs you entered.
- Avg. Monthly Searches: You can see the average number of keyword searches and their close variations based on the month range, as well as the location and search network settings you chose. It’s a great way to find out if your keywords are popular or not.
Pay attention to seasonal keywords, as results can be misleading for monthly searches. Seasonal keywords like New Year’s gifts may get 100,000 searches in December and 1,000 in June, but Google Keyword Planner indicates that there are 15,000 searches per month.
- Competition: It shows how competitive your keywords are for ad placements. “Low”, “Medium” and “High” are the levels of competition. If there’s not enough data, you’ll see a dash (-). This data relates to competition on Google Ads and is therefore not helpful for SEO-focused keyword research.
- Top of Page Bid (used to be called CPC): It refers to the possible amount you have to pay to get your ad to appear at the top. You’ll see two options as “High Range” and “Low Range”. If a Top of Page Big is high, there’s a lot of competition. That means you can filter out the words that aren’t commercially important by choosing low range options.
Step 5: Choose your keywords
The last step is to choose your keywords for your ad campaign. You can arrange your keywords according to your strategy. Keep the following points in mind when choosing keywords for your PPC campaign.
First, with a higher average search volume, you’ll get more visitors. Second, if there is higher competition and higher suggested bid, it means you can get more traffic with that keyword. In addition, it may be easier to convert that traffic into customers.
Effective ways to use Keyword Planner
Get exact keyword search volume data
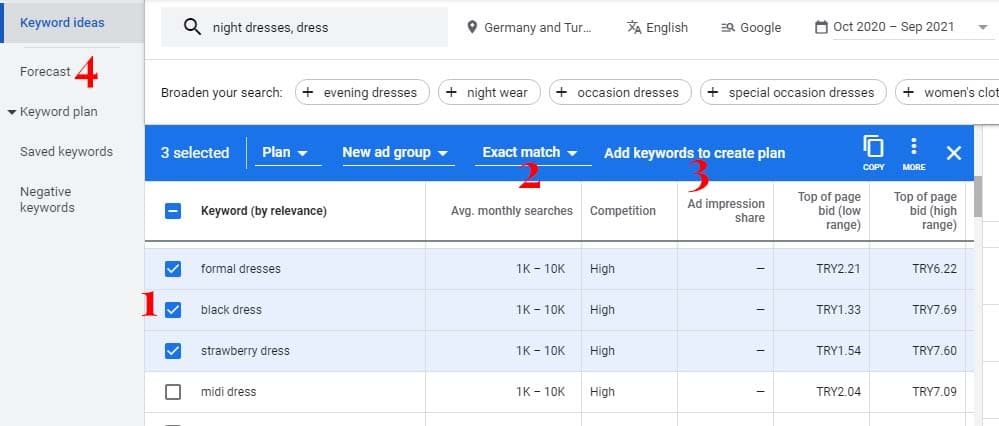
Adding keywords to your plan will give you exact search volume data. On the results page of the tool, check the tiny boxes of keywords you want to add to your plan. Then select the “exact match”, click “Add keyword” and go to the “Forecast” section to see the exact search volume.
Show your ads to your target audience based on their location
The Keyword Planner’s filters allow you to select where you want your ads to show based on language and region. This feature can be especially useful if you have a business where you want to increase customers by targeting people who are searching in your area. Keyword search volume can be high across the country or in a large region. By filtering where you want to place your ad, you can find out if the keyword is popular or irrelevant in your area.
Pay attentions competitors’ bids
Depending on the number of bidders, the level of competition for a keyword varies. A highly competitive keyword will have a higher cost per bid. Using these keywords will increase your cost and make it harder for your ad to reach more people. You can also see the average amount paid for a keyword under “Top of Page Bid”. If you choose the most appropriate one for your ad budget, you’ll have more chances to reach potential customers with these keywords.
Use negative keywords

Many people ignore the power of negative keywords in PPC campaigns. In fact, they can prevent your ads from being shown to people who are searching for products that aren’t related to your business. It’s easy to add negative keywords in Keyword Planner. You’ll find “Negative keyword” section under “Keyword plan”. Click on it and add negative keywords to your plan.
Besides, you can check the “Save keywords” option to see the historical metrics. This section is also located under “Keyword plan”.
Key takeaways
???? See keyword performance, clicks and impressions in one place.
???? Analyze and refine your keyword lists.
???? Save time and money by using Google Keyword Planner effectively.
???? Get a better understanding of your target audience.
???? Get more valuable data to make your advertising strategies more effective.
???? Know how to best rank for keywords.


