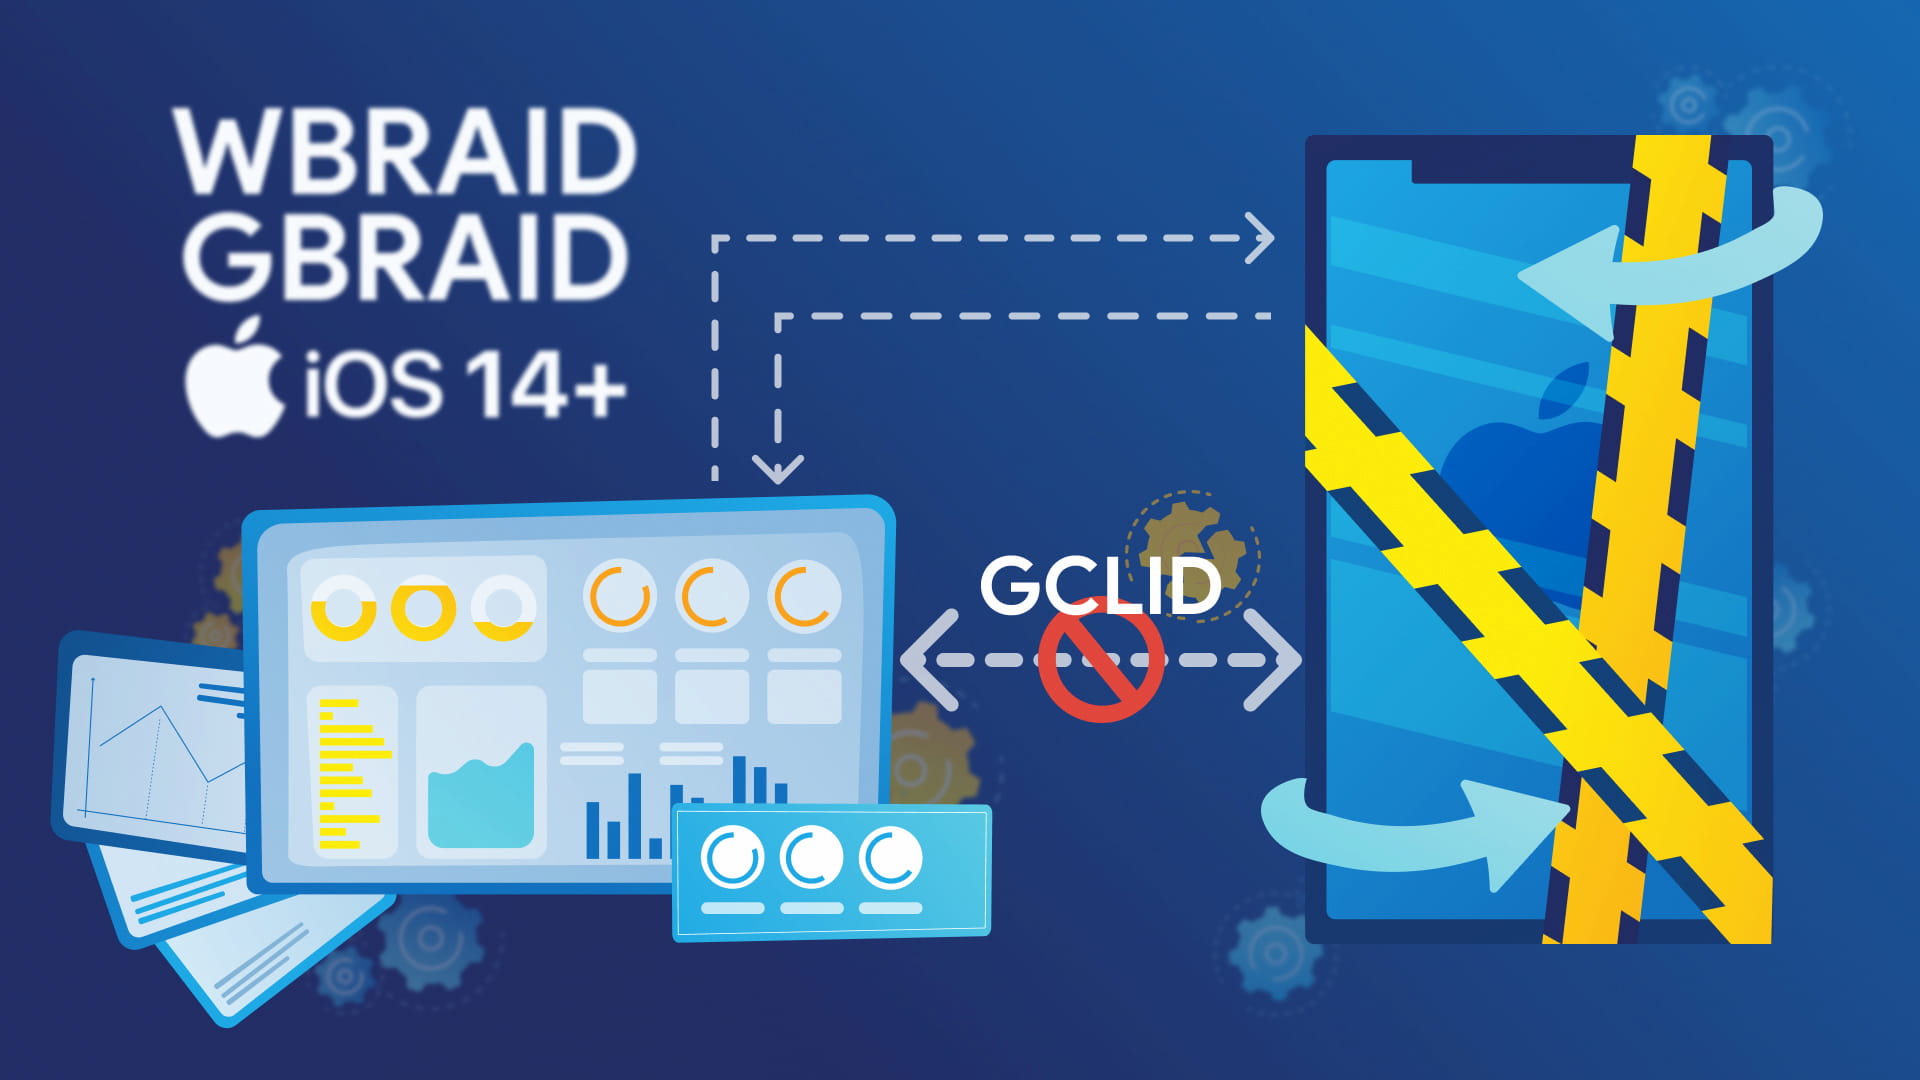
Apple’s iOS 14+ update has affected ad tracking, leading to the decline of GCLID’s ability. To adapt this changes, Google introduced WBRAID and GBRAID. These parameters ensure advertisers can measure campaign effectiveness within its privacy constraints.
What is GCLID?
GCLID (Google Click Identifier) is a tracking parameter for Google ad clicks and measuring conversions. It helps advertisers better understand the sources and impact of clicks, enabling them to optimize ad campaigns and increase ROI (Return on Investment). This unique identifier allows tracking of the ad click sources and other essential data.
The GCLID parameter shares the following data related to paid clicks with Google Ads:
- Source
- Campaign
- Keyword data
- Match type
- Medium
- Traffic information
- User details
- Landing page
- Conversion tracking
- Page data
With this information, you can measure the performance of your ads and optimize your campaigns. For more information about GCLID, you can view this post.
Impact of iOS 14+ Update on GCLID
In order to comply with Apple’s App Tracking Transparency (ATT) policy changes, Google no longer sends GCLID parameters from various Google applications in iOS traffic. The &gclid={GCLID} won’t be appended to ad clicks, and the {gclid} ValueTrack parameter will be set to empty text. This has the following effects:
- Decreased Reported Web Conversions: The absence or incomplete information in the GCLID parameter makes it difficult for advertisers to track conversions on their websites accurately. This can negatively impact campaign optimization and limit the ability to track conversions from clicks.
- Decreased Reported Offline Conversions: Incomplete or delayed data in the GCLID parameter can also negatively affect the accurate tracking of offline conversions. This can limit advertisers’ ability to track and analyze offline interactions.
These changes can potentially negatively impact advertisers’ ability to track conversions and optimize ad campaigns. Users’ ability to opt out of tracking processes may make GCLID and similar tracking identifiers less reliable. As a result, advertisers may need to reevaluate their strategies and explore alternative tracking methods in light of the iOS 14+ update.
Further information on Google support.
GCLID Alternatives: WBRAID and GBRAID
As an alternative to GCLID, Google Ads introduced two new URL parameters to help advertisers measure ad performance for iOS users. These parameters are compliant with Apple’s ATT policies:
WBRAID
This new parameter, &wbraid={WBRAID}, will help you attribute conversions back to your ad campaigns and work with conversion modeling to give you a more accurate measurement on iOS.
App to Web Conversion Tracking
Example: A user clicks on an app ad and then completes a purchase or action on a website. WBRAID attributes this conversion.
Purpose: Tracks web conversions resulting from app ad interactions.
GBRAID
This new parameter can help you measure app conversions driven by ad campaigns on iOS. It’s added to landing page URLs when auto-tagging is enabled for all iOS14+ clicks.
App to App or Web to App Conversion Tracking
Example: A user clicks on a web ad and installs or takes action in an app. GBRAID tracks this conversion.
Purpose: Tracks app conversions resulting from web or app ad interactions.
How to store WBRAID and GBRAID in Google Analytics custom dimensions
Similar to GCLID, with a few changes to Google Analytics, you can start recording WBRAID and GBRAID parameters and use them later in your reports. You can also use these saved parameters to create Offline Conversions in the future. The steps you need to follow to perform this operation are as follows:
Setup Google Analytics 4 property to store WBRAID and GBRAID
- Log in to your Google Analytics 4 property.
- Access the Admin page by clicking the bottom button on the left navigation menu.
- Click on “Data Display > Custom Definitions” in the left menu.
- Click the “Create custom dimension” button.
- Create a custom dimension for WBRAID and GBRAID as shown below:
- Dimension Name: GBRAID or WBRAID (for each parameter)
- Scope: Event
- Even parameter: gbraid or wbraid (for each parameter)
- Description: Customize as needed
Once these steps are completed, you can begin storing and using these parameters in your Google Analytics 4 events. Make sure to send these parameters from your website to your Google Analytics 4 property.
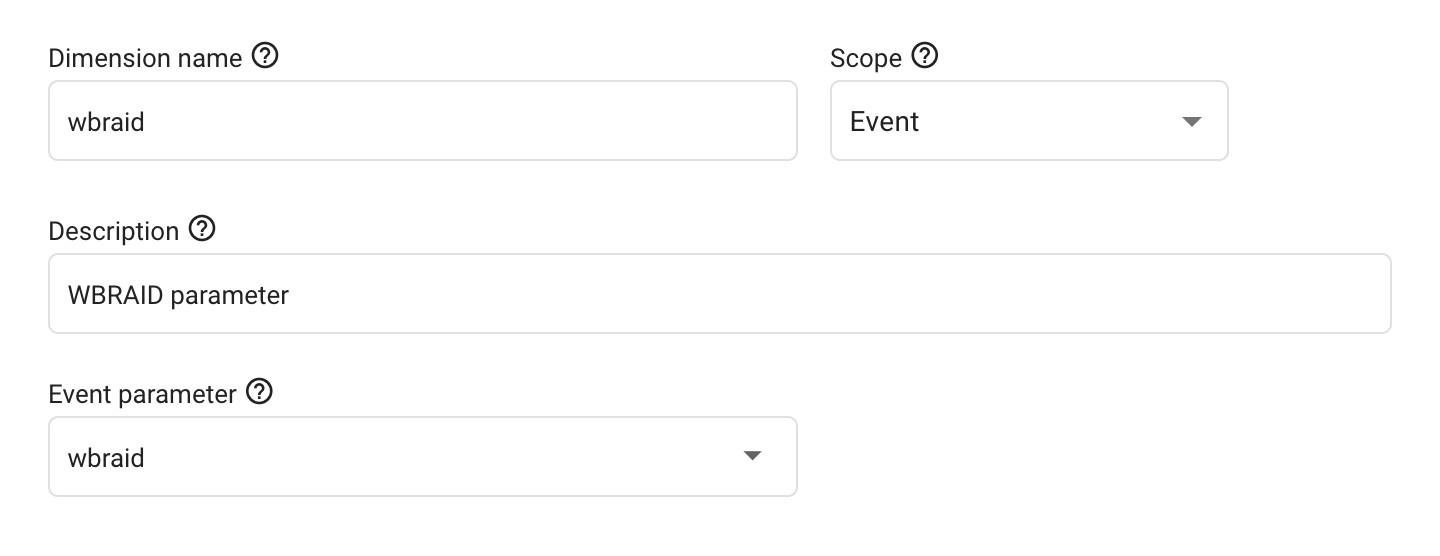
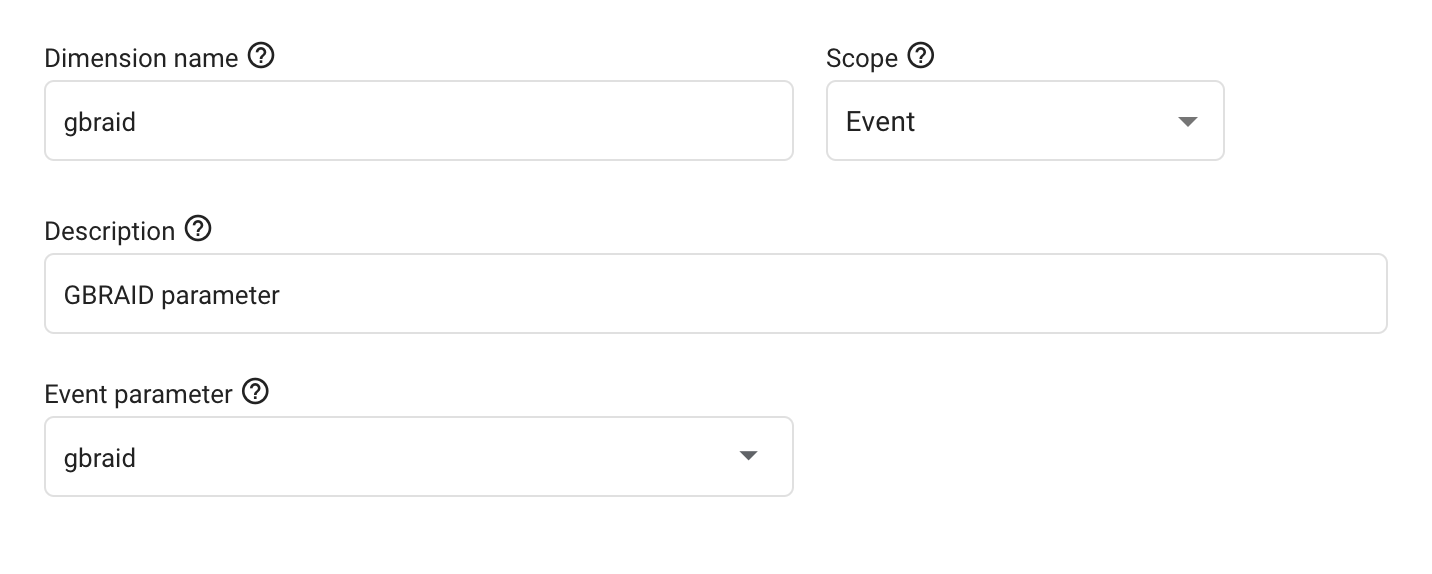
You can change the Description section according to your needs. The important thing is to make sure that the Dimension name and Event parameter fields are the same as in the image above.
After these steps, you’re ready to store WBRAID and GBRAID parameters in GA4 Events and display them in reports. However, another step required for completing the process is ensuring these parameters are sent from your website to your Google Analytics 4 property.
Set up Google Tag Manager to send WBRAID and GBRAID parameters
Similar to this post, where we explained how to store the GCLID parameter in GA4, you can now send the WBRAID and GBRAID parameters of events to your GA4 property with a few simple changes to be made on GTM. The steps you need to follow for this are:
Add WBRAID and GBRAID Variables in Google Tag Manager.
- Log into Tag Manager and select your GTM Container.
- Click “Variables” button on the left navigation bar.
- Click “New” button.
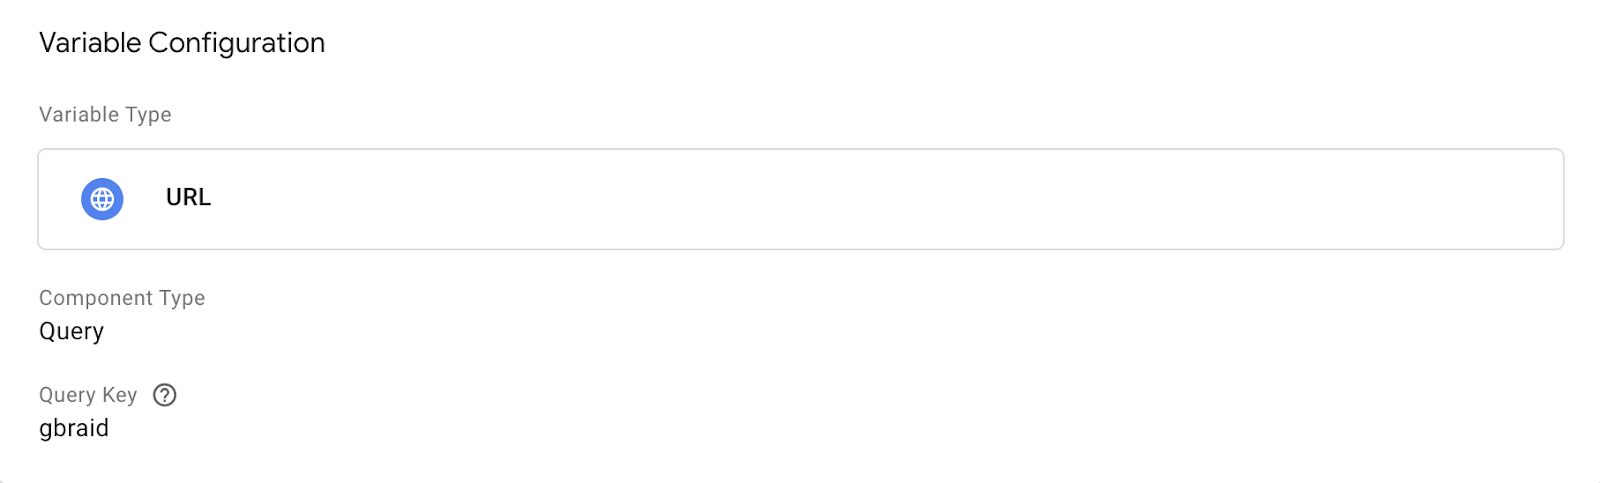
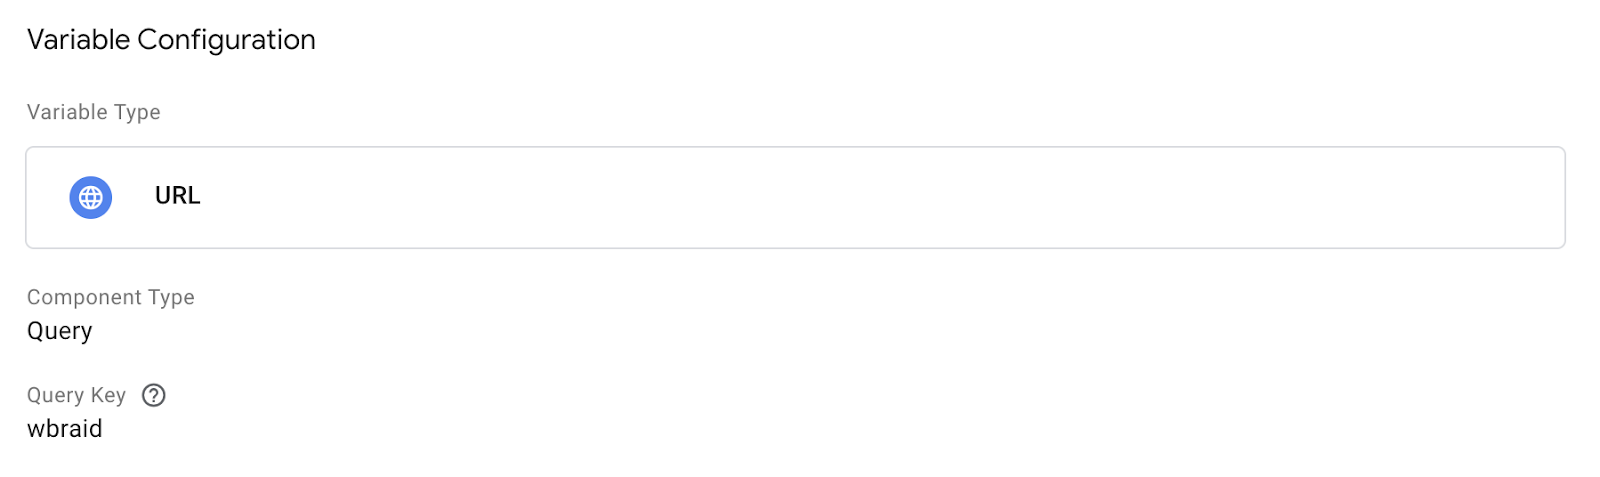
- Choose “URL” as variable type.
- Choose “Query” for component type.
- Type “GBRAID” for query key field.
- Save variable with GBRAID name.
- Repeat the steps above for WBRAID parameter.
Edit Google Tag
- Log into Tag Manager and select the Container you use on your website.
- Press the “Tags” button from the left menu.
- Select your Google Analytics 4 Configuration tag from the list that you continue to use – newly known as Google Tag. If you’re not using a Google Tag in your GTM container yet, you can follow the steps in this post to learn how to enable it: <place link here>
- Click on the Shared Event settings panel.
- Click the Add Parameter button.
- Type “GBRAID” in the <Event Parameter> field and “GBRAID” in the Value field.
- GBRAID is the GA4 Custom dimension name you created in the previous title.
- GBRAID is the variable name you created in the previous steps.
- Repeat the above process for WBRAID.
- Click the Add Parameter button.
- Type “WBRAID” in the <Event Parameter> field and “WBRAID” in the Value field.
- WBRAID is the GA4 Custom dimension name you created in the previous title.
- WBRAID is the variable name you created in the previous steps.
After completing these steps, your GTM container will start sending your WBRAID and GBRAID parameters to your Google Analytics property. You can start to see these parameters in your reports. Please note that these parameters will only be included in the reports for the dates after these changes are made. Unfortunately, you can’t see your previous WBRAID and GBRAID parameters in your Google Analytics reports. However, if you have previously completed the process of linking your Google Analytics data with BigQuery, it may be possible to see the parameters of the past days.
Finding WBRAID and GBRAID using BigQuery raw data
If you’re transferring your Google Analytics 4 data to BigQuery, you can see your WBRAID and GBRAID parameters of the events with a few simple SQL queries.
The following query allows you to see events containing WBRAID or GBRAID parameters in Google Analytics 4:
SQL Statement:
SELECT * FROM `project-name.analytics-table-name.events_*` where (SELECT value.string_value FROM UNNEST(event_params) where key = ‘wbraid’) is not null or (SELECT value.string_value FROM UNNEST(event_params) where key = ‘gbraid’) is not null
However, you shouldn’t forget that your events will only have these parameters after performing the above-mentioned steps in GA4 and GTM. You can use the page_location parameter of the event to see the GBRAID or WBRAID parameters before this date. Because even if event parameters are not added, page_location will contain these parameters.
SQL Statement:
SELECT *,
split(
  (
SELECT
*
FROM
UNNEST(
split(
(SELECT value.string_value FROM UNNEST(event_params) where key="page_location")
,"&")
) AS param
where param like "%gbraid%" limit 1
),"=") [safe_offset(1)] AS gbraid,
split(
  (
SELECT
*
FROM
UNNEST(
split(
(SELECT value.string_value FROM UNNEST(event_params) where key="page_location")
,"&")
) AS param
where param like "%wbraid%"  limit 1
),"=") [safe_offset(1)] AS wbraid

 FROM `precision-tax.analytics_302847746.events_*`
 where
(SELECT value.string_value FROM UNNEST(event_params) where key="page_location") like "%wbraid%" or (SELECT value.string_value FROM UNNEST(event_params) where key="page_location") like "%gbraid%"
You can obtain WBRAID and GBRAID parameters from your BigQuery raw data by using the query you need. You can then import your offline conversions into Google Ads by using these parameters instead of GCLID.
Offline Conversion imports with WBRAID or GBRAID
In cases where you don’t have a GCLID, you can upload your offline conversions to Google Ads using WBRAID or GBRAID, just like you do with GCLID. However, unfortunately, using a click identifier other than GCLID isn’t currently supported on the Google Ads UI side. In other words, you can’t create an offline conversion file by using your WBRAID and GBRAID parameters instead of GCLID. Although Google may support this in the near future. However, there is still a way you can use to create offline conversions with WBRAID or GBRAID parameters.
Using Google Ads API to upload Offline Conversions
You can use the Google Ads API to upload offline click conversions into Google Ads to track ads that led to sales in the offline world, such as over the phone or through a sales rep. And you can use any of the GCLID, WBRAID or GBRAID parameters as a click identifier when using this API.
The most important point you should pay attention to is that you should use only one click identifier for each upload. So you can’t use WBRAID and GBRAID together. The code below is taken from the Google Ads API documentation and allows you to upload offline conversions using Python. You can visit the documentation page for examples in different languages.
Python Code:
def main(
    client,
    customer_id,
    conversion_action_id,
    gclid,
    conversion_date_time,
    conversion_value,
    conversion_custom_variable_id,
    conversion_custom_variable_value,
    gbraid,
    wbraid,
    order_id,
):
    """Creates a click conversion with a default currency of USD.

    Args:
        client: An initialized GoogleAdsClient instance.
        customer_id: The client customer ID string.
        conversion_action_id: The ID of the conversion action to upload to.
        gclid: The Google Click Identifier ID. If set, the wbraid and gbraid
            parameters must be None.
        conversion_date_time: The the date and time of the conversion (should be
            after the click time). The format is 'yyyy-mm-dd hh:mm:ss+|-hh:mm',
            e.g. '2021-01-01 12:32:45-08:00'.
        conversion_value: The conversion value in the desired currency.
        conversion_custom_variable_id: The ID of the conversion custom
            variable to associate with the upload.
        conversion_custom_variable_value: The str value of the conversion custom
            variable to associate with the upload.
        gbraid: The GBRAID for the iOS app conversion. If set, the gclid and
            wbraid parameters must be None.
        wbraid: The WBRAID for the iOS app conversion. If set, the gclid and
            gbraid parameters must be None.
        order_id: The order ID for the click conversion.
    """
    click_conversion = client.get_type("ClickConversion")
    conversion_upload_service = client.get_service("ConversionUploadService")
    conversion_action_service = client.get_service("ConversionActionService")
    click_conversion.conversion_action = (
        conversion_action_service.conversion_action_path(
            customer_id, conversion_action_id
        )
    )

    # Sets the single specified ID field.
    if gclid:
        click_conversion.gclid = gclid
    elif gbraid:
        click_conversion.gbraid = gbraid
    else:
        click_conversion.wbraid = wbraid

    click_conversion.conversion_value = float(conversion_value)
    click_conversion.conversion_date_time = conversion_date_time
    click_conversion.currency_code = "USD"

    if conversion_custom_variable_id and conversion_custom_variable_value:
        conversion_custom_variable = client.get_type("CustomVariable")
        conversion_custom_variable.conversion_custom_variable = (
            conversion_upload_service.conversion_custom_variable_path(
                customer_id, conversion_custom_variable_id
            )
        )
        conversion_custom_variable.value = conversion_custom_variable_value
        click_conversion.custom_variables.append(conversion_custom_variable)

    if order_id:
        click_conversion.order_id = order_id

    # Uploads the click conversion. Partial failure must be set to True here.
    #
    # NOTE: This request only uploads a single conversion, but if you have
    # multiple conversions to upload, it's most efficient to upload them in a
    # single request. See the following for per-request limits for reference:
    # https://developers.google.com/google-ads/api/docs/best-practices/quotas#conversion_upload_service
    request = client.get_type("UploadClickConversionsRequest")
    request.customer_id = customer_id
    request.conversions.append(click_conversion)
    request.partial_failure = True
    conversion_upload_response = (
        conversion_upload_service.upload_click_conversions(
            request=request,
        )
    )
    uploaded_click_conversion = conversion_upload_response.results[0]
    print(
        f"Uploaded conversion that occurred at "
        f'"{uploaded_click_conversion.conversion_date_time}" from '
        f'Google Click ID "{uploaded_click_conversion.gclid}" '
        f'to "{uploaded_click_conversion.conversion_action}"'
    )
Uploading offline conversions with WBRAID or GBRAID using Google Ads UI may start to be supported by Google in the future. In order not to miss the latest developments on this subject, you can follow our new articles or subscribe to our email list. Also, if you want to upload Offline Conversions to Google Ads using GCLID, you can take a look at this article.
Trouble to set up your own solution?
Don’t have a developer in your marketing team and struggling to set up Google Ads conversion tracking properly? We do that for our business partners. If you’re interested, feel free to contact us. We’re here to help you.