Google Tag Manager (GTM) is a user-friendly platform that enables you to manage and deploy website tracking codes and tags without requiring direct code changes. That is, it simplifies tracking implementation and updates.
Understanding what’s happening in your GTM instance, tracking errors, and finding their cause is imperative. In this article, we’ll talk about how to debug using preview mode in GTM.

What is Google Tag Manager preview mode?
GTM preview mode is a feature that helps you test and validate changes you make to your tracking and analytics setup before deploying them live on your website. It’s like a sandbox where you can experiment with tracking configurations without impacting real user data. Besides, it allows you to confirm that your tracking codes behave as intended before they become active for your website’s visitors. And perhaps the most important is the debug feature, which is also the subject of this article.
The preview mode of GTM allows you to explore a website where your GTM container code is applied, enabling you to preview the tags that are being triggered.
How to enable preview / debug mode
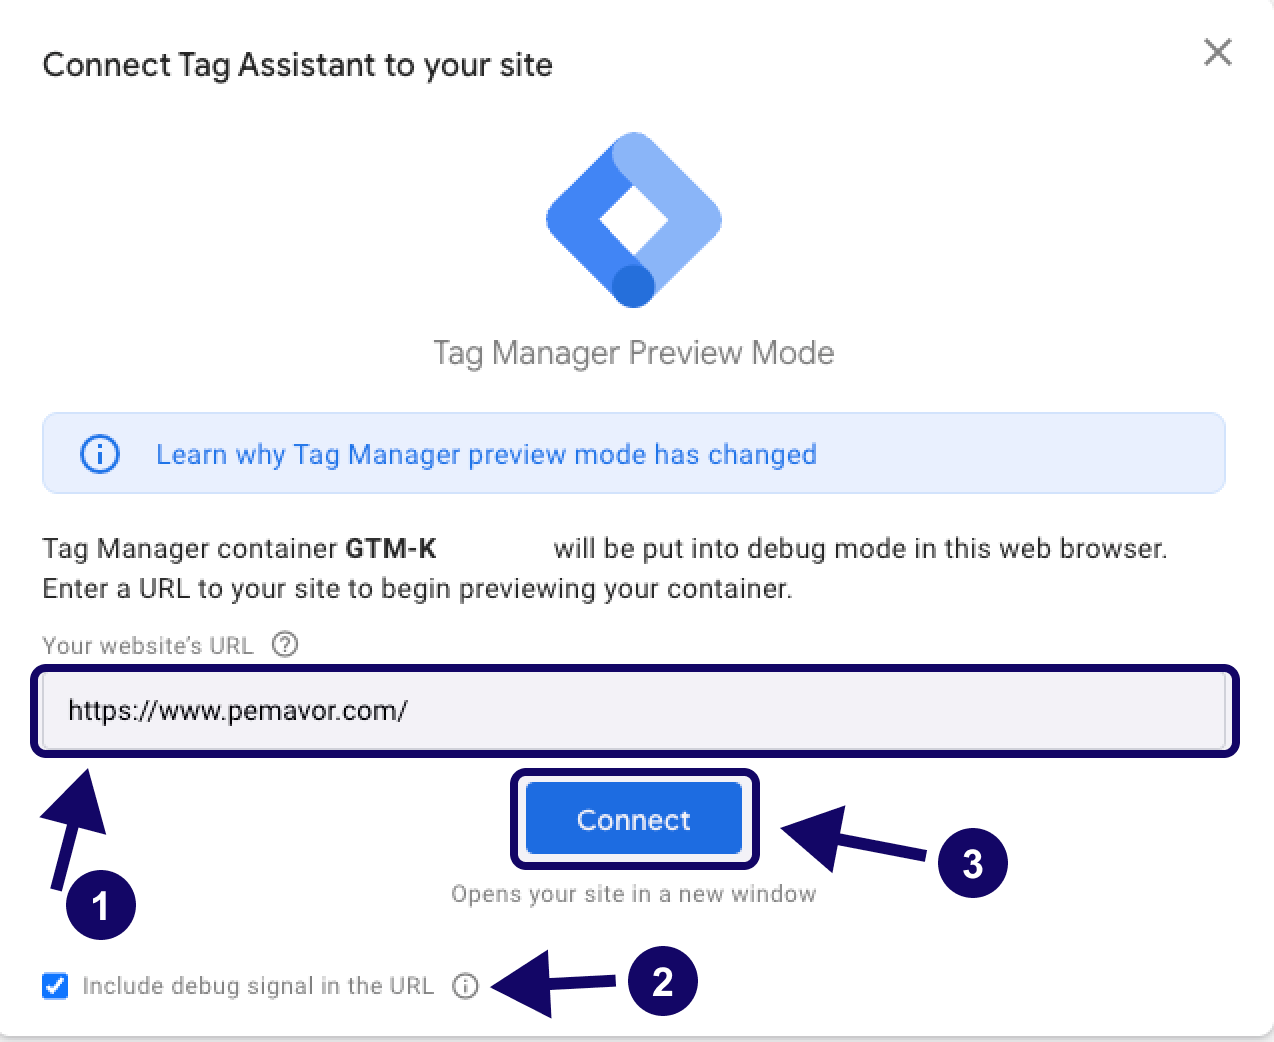
Follow the steps below to enable preview and debug mode:
1. Login to Google Tag Manager.
2. Click the “preview” button in the top right corner.
3. Enter your website URL (including https)
4. Check the “include debug signal in the URL” box.
5. Click the “Connect” button.
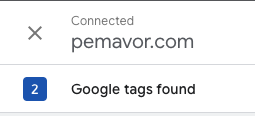
6. Your website will open in a new window and appear “Connected” at the right of the bottom.
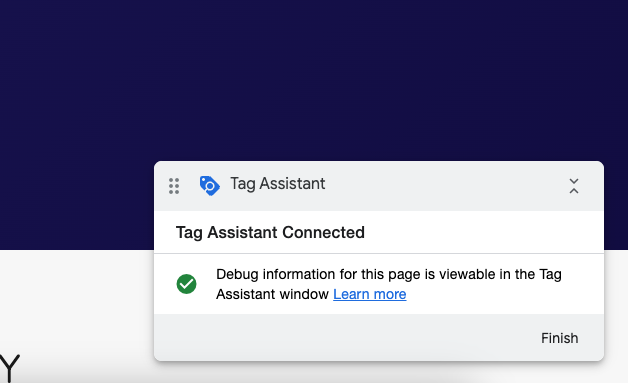
You can add the Tag Assistant Companion Chrome extension to your browser if you want to use it in a new tab instead of a new window.
Plus, you can return to the GTM page by minimizing the pop-up window. Thus, you have activated the preview and debug mode. In the next topic, we’ll overview the debug screen.
GTM preview page overview
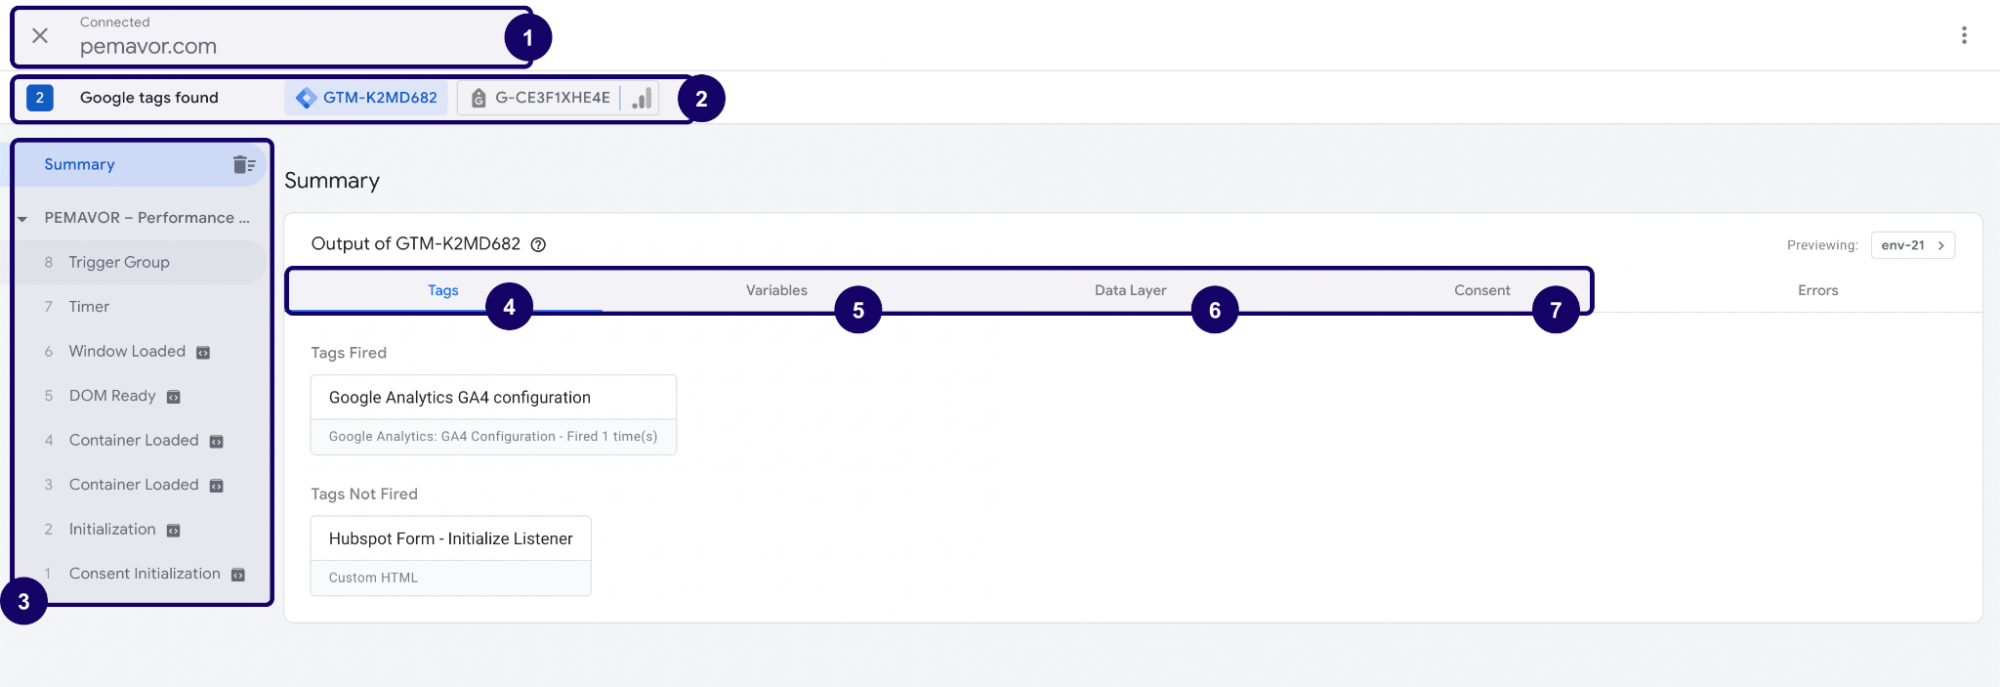
1. Connected website
Here, you can see the website you connected with GTM preview mode.
2. Available Tags List
In this section, all available tags for connected websites will be listed. If you want to preview/debug for different tags, you can click on a tag name to switch between tags.
3. Event List
A list of all events taking place on the website is displayed in order from newest to oldest. You should note here that these events are dataLayer events, not GA4 events. We’ll publish a detailed article on the difference between the two soon, and if you don’t want to miss it, don’t forget to subscribe to our mailing list. The section on the right drills down according to the event selected on the event list. Therefore, select an event from the list here to debug a specific event. Or you can choose “Summary” to work with all events combined.
Keep in mind that these dataLayer events are separate from GA4 events shown in Google Analytics’ DebugView. Both tools can be used in parallel to troubleshoot tracking issues more effectively.
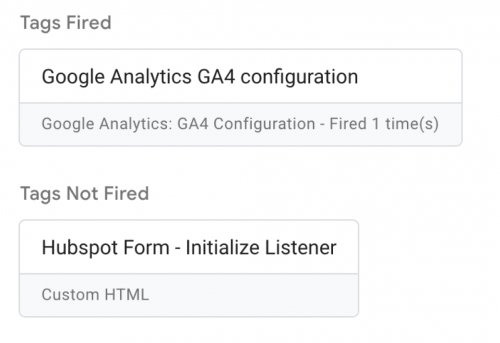
4. Tags
List of “Fired” and “Not Fired” tags. When an event is selected in the left column, the Tags tab will show the status of tags for that event. If a tag is fired, it means that the trigger you specified in GTM when creating the tag was triggered. If this trigger has not been triggered yet, this tag is shown as “Not fired”.
5. Variables
Detailed information about the variables at the selected event time is shown. An event is available from the left menu to view the variables’ details when any event is triggered.

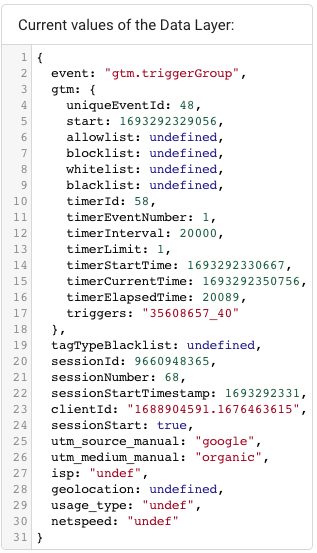
7. DataLayer
The Data Layer section will display the precise message sent to the data layer for the chosen event, along with the appearance of the data layer after the message process is finished. Click on an event in the side menu to see the condition of the data layer when the event was triggered.
8. Consent
Shows the state of consent at the time of the selected event. For more information about consent, click here.
9. Errors
Displays if any GTM Tag couldn’t be fired because of an error.
Stop and share debugging
You can stop the debug process anytime and share your debug page with another user via email, so you can work collaboratively. To stop debugging, visit this page to find the domain you started debugging for from the list, and click “Stop debugging”.

Another way is to do this directly from the debug screen. Click the “X” icon in the top left corner of the debug screen.
When debug mode is enabled, you can only see the debug interface from the browser in which you have enabled preview and debug mode. However, you can share this preview with others with a specially created URL. To do this:
- You can visit tagassistang.google.com and click the
 button for the domain you have enabled debugging from the list, then click “Share” button.
 - You can press the button on the top right of the debug interface and press the “Share” button.
Then, you can copy the debug link from the screen that appears and share it with anyone you want.

Do you need customizable solution?
It’s totally understandable if you’re looking for a more customized solution for your business. PEMAVOR builds unique tools and scripts that can drive more conversions. Contact us now to talk about details.