Google Ads has many great features that allow you to target your ads to people who are looking for specific products or services, but one of the best is GCLID. And thanks to “Auto-tagging” you can add parameters to your ad URLs in a automatic way so that you can track conversions and see how well your campaign is doing. One of the most important things about this function is that it’s easy to set up and manage in Google Ads and best of all, it only takes a few minutes.
What is GCLID?
GCLID – or Google Click Identifier – allows you to track your Google Ads campaigns & ads. With GCLID, you’ll be able to collect a lot of information to better understand the behavior of people visiting your website by clicking on your ad.
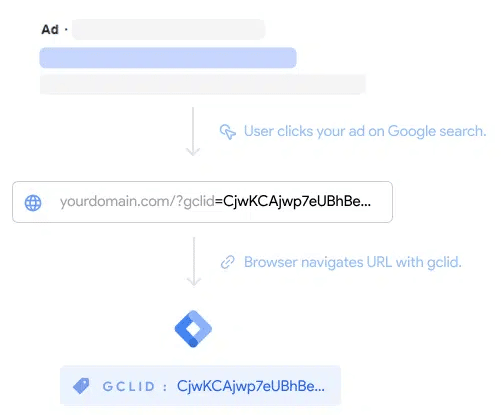
GCLIDs are available as a parameter at the end of the URLs to which users are directed when they click on your ads. By storing this parameter, you can use it to get more information and make decisions about your campaigns and user behavior in the future. The easiest way to start tracking GCLIDs would be to use the “Auto-tagging” feature provided by Google Ads.
What is Auto-Tagging?
Auto-tagging is a feature in Google Ads that automatically generates and attaches a unique tracking ID (GCLID) to your ad URLs. This tracking ID allows Google to track the actions people take after they click on your ad, such as whether they purchase your product or sign up for your newsletter.
Auto-tagging is an important tool for measuring the effectiveness of your Google Ads campaigns. By tracking the actions people take after clicking on your ads, you can determine which campaigns are driving valuable conversions and adjust your budget accordingly. And best of all, it takes only a few seconds to enable this feature!
How to Enable Auto-Tagging To Track GCLID
To activate auto-tagging in Google Ads, follow these steps:
- Sign in to your Google Ads account.
- Select the account you want to enable auto-tagging
- On the left menu, click “Settings”, then “Account Settings”
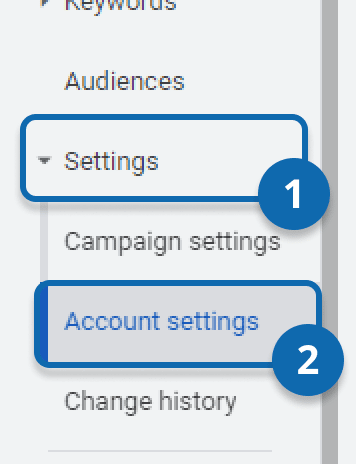
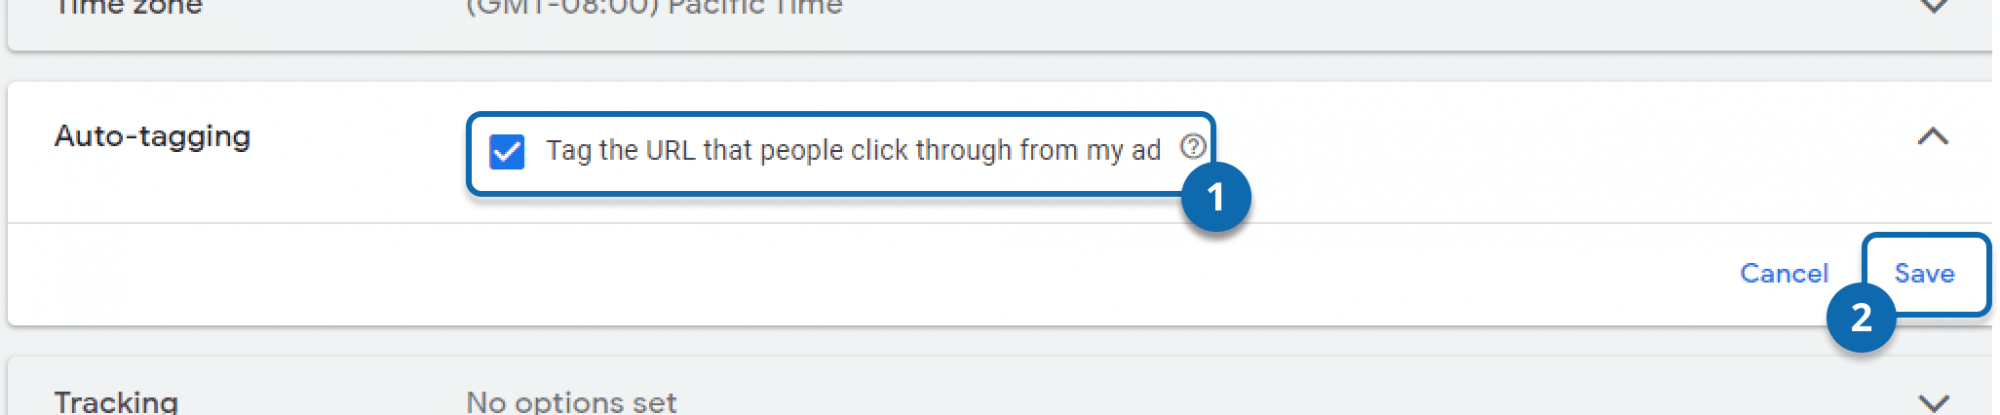
- Find “Auto-tagging” on the list, click to expand panel.
- Click checkbox “Tag the URL that people click through from my ad” to enable auto-tagging.
- Click “Save” button to save changes.
With auto-tagging enabled, your final URL will automatically be tagged with Google Analytics parameters when someone clicks on your ad. This allows you to track your ad performance in Google Analytics and see which ads are driving traffic to your website.
That’s it! Now, when someone clicks on a Google ad for your “www.example.com” site, the final URL will be “www.example.com/?gclid=123xyz”. Since auto-tagging is now active, you will be able to track GCLIDs thanks to the Google Analytics tag on your site.
To make use of the GCLID in Google Analytics 4 you have to save it as custom dimension. If you store your GCLID in GA4, you can make use of offline conversions that are imported to Google Ads for up to 90 days back using the GCLID Identifier. This makes sense when you run a business using, e.g., leads as conversion events, that have longer sales cycles.